Billing Terms & Conditions
Effective Date: 12.12.2024
These Billing Terms and Conditions ("Terms") govern the payment and billing practices of Calia Beauty ("we," "our," or "us") for products and services offered through our website caliabeauty.com (the "Website"). By making a purchase, you agree to these Terms. If you have any questions, contact us at contactcaliabeauty@gmail.com.
1. Payment Methods
We accept the following payment methods:
- Credit cards (Visa, Apple Pay, PayPal, MasterCard, American Express, Discover)
- Debit cards
- Other payment methods as specified at checkout
All payments must be made in the currency specified during the checkout process.
2. Billing Information
To complete a purchase, you must provide accurate and complete billing information, including:
- Name
- Billing address
- Payment details
- Contact information (email and phone number)
You are responsible for ensuring that your billing information is current and accurate.
3. Pricing and Taxes
All prices listed on our Website are in american dollars unless otherwise stated. Prices do not include applicable taxes, which will be calculated and displayed at checkout. You are responsible for paying all taxes associated with your purchase.
4. Order Confirmation
Upon successful payment, you will receive an order confirmation via email. This confirmation serves as your receipt and includes details of your purchase. If you do not receive an email confirmation, please contact us at contactcaliabeauty@gmail.com.
5. Refunds and Returns
Refunds and returns are governed by our Return Policy, which is available on our Website. Please review the Return Policy before making a purchase.
6. Failed Payments
If a payment fails due to insufficient funds, incorrect payment information, or other issues, we reserve the right to:
- Cancel the order
- Suspend access to products or services until payment is successfully processed
- Charge any applicable fees associated with the failed payment
7. Recurring Payments
If you sign up for a subscription or recurring service, you authorize us to charge your selected payment method automatically at the agreed-upon intervals. You may cancel your subscription at any time by contacting us at contactcaliabeauty@gmail.com.
8. Chargebacks and Payment Disputes
If you initiate a chargeback or dispute a payment, we may:
- Suspend or terminate your account
- Investigate the dispute and provide documentation to the payment processor
- Take legal action to recover amounts owed, including additional fees incurred
9. Changes to Billing Terms
We reserve the right to update these Billing Terms and Conditions at any time. Changes will be posted on this page with an updated "Effective Date." Continued use of our Website or services after changes are posted constitutes acceptance of the revised Terms.
10. Contact Us
If you have any questions or concerns about these Billing Terms and Conditions, please contact us:
Email: contactcaliabeauty@gmail.com
By making a purchase, you agree to these Billing Terms and Conditions.
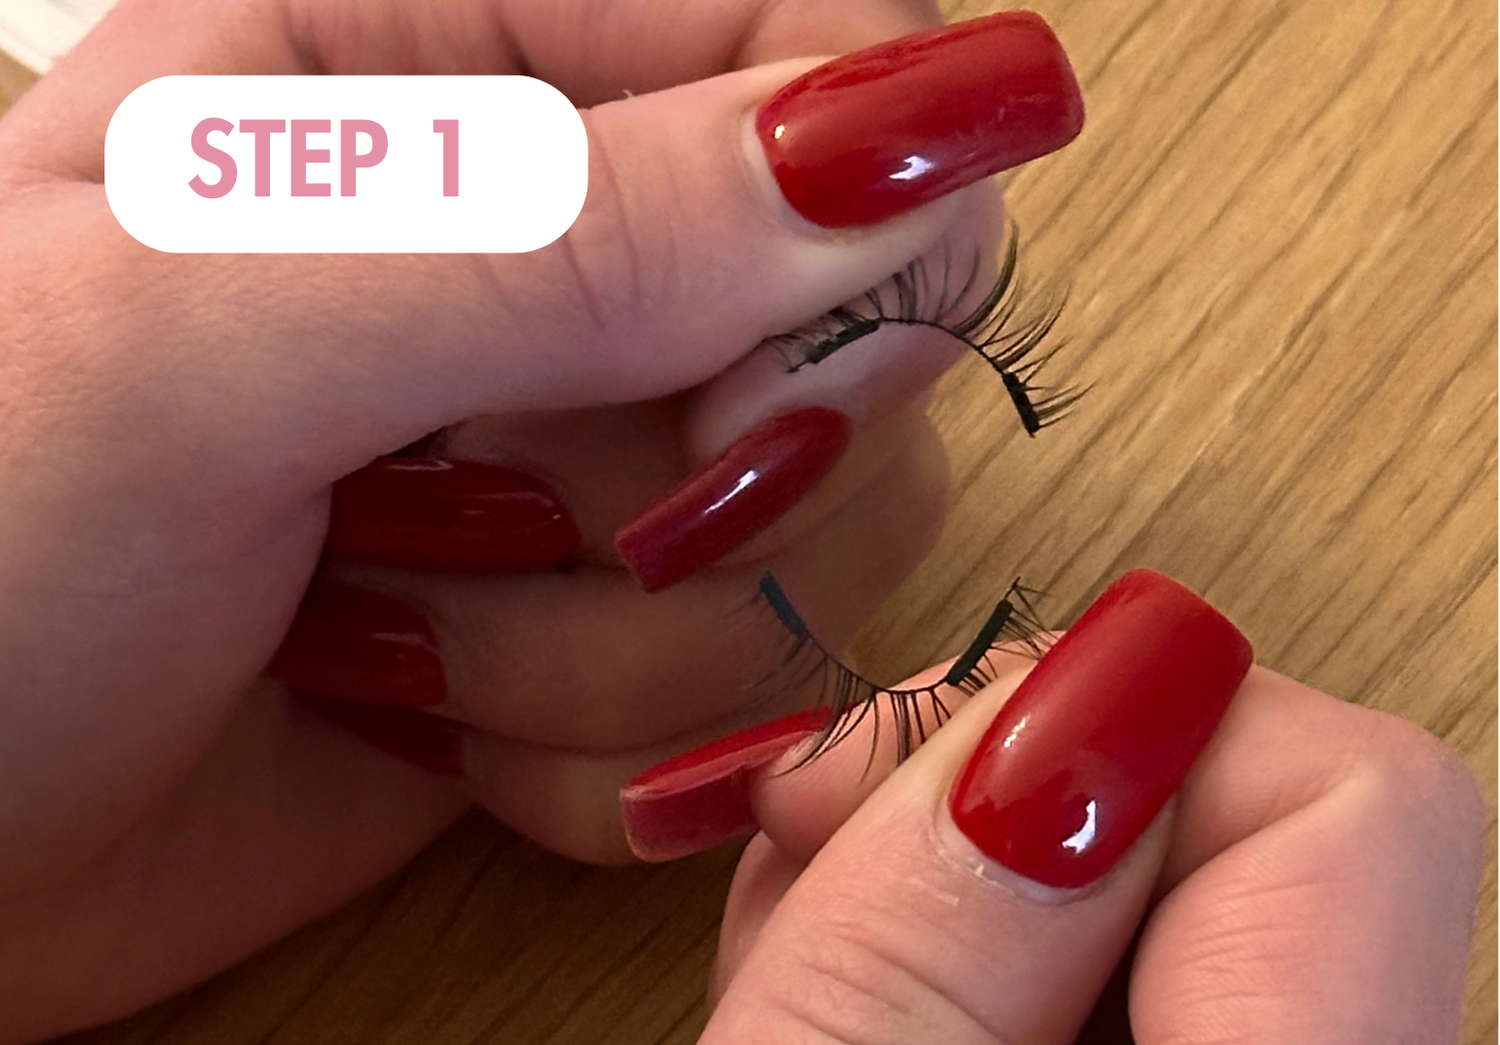
Prepare the Lashes
Each set of Calia Beauty magnetic lashes is designed for both eyes, with shorter lashes at the inner corner and longer ones at the outer corner. Be sure to identify the front and back of the strip before use.
Gently lift one lash strip from the case. To separate it into two individual lashes, lightly rub the magnet area up and down.
Important: Avoid pulling the lashes apart directly, as this can damage them.
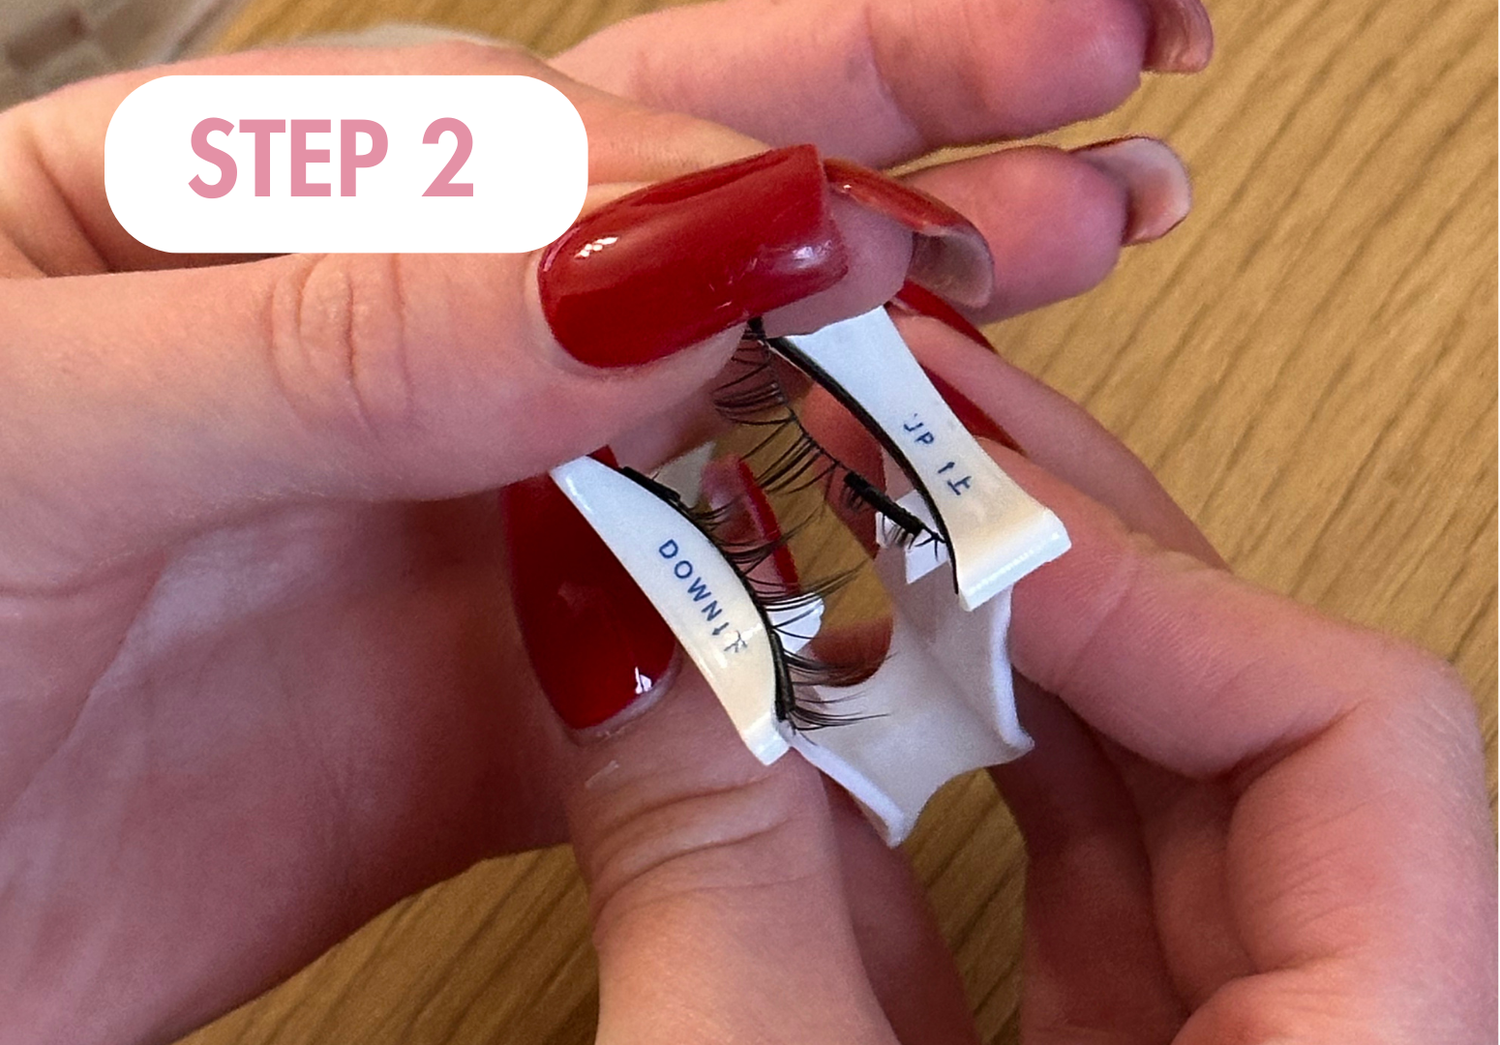
Place the Lashes in the Magnetic Applicator
Each lash strip has 3 magnets - one flat side and one raised side.
To correctly place the lashes in the applicator, position the flat side of the magnet against the applicator, with the raised side facing inward. This ensures the lash strip will attach to your natural lashes, not to the applicator.
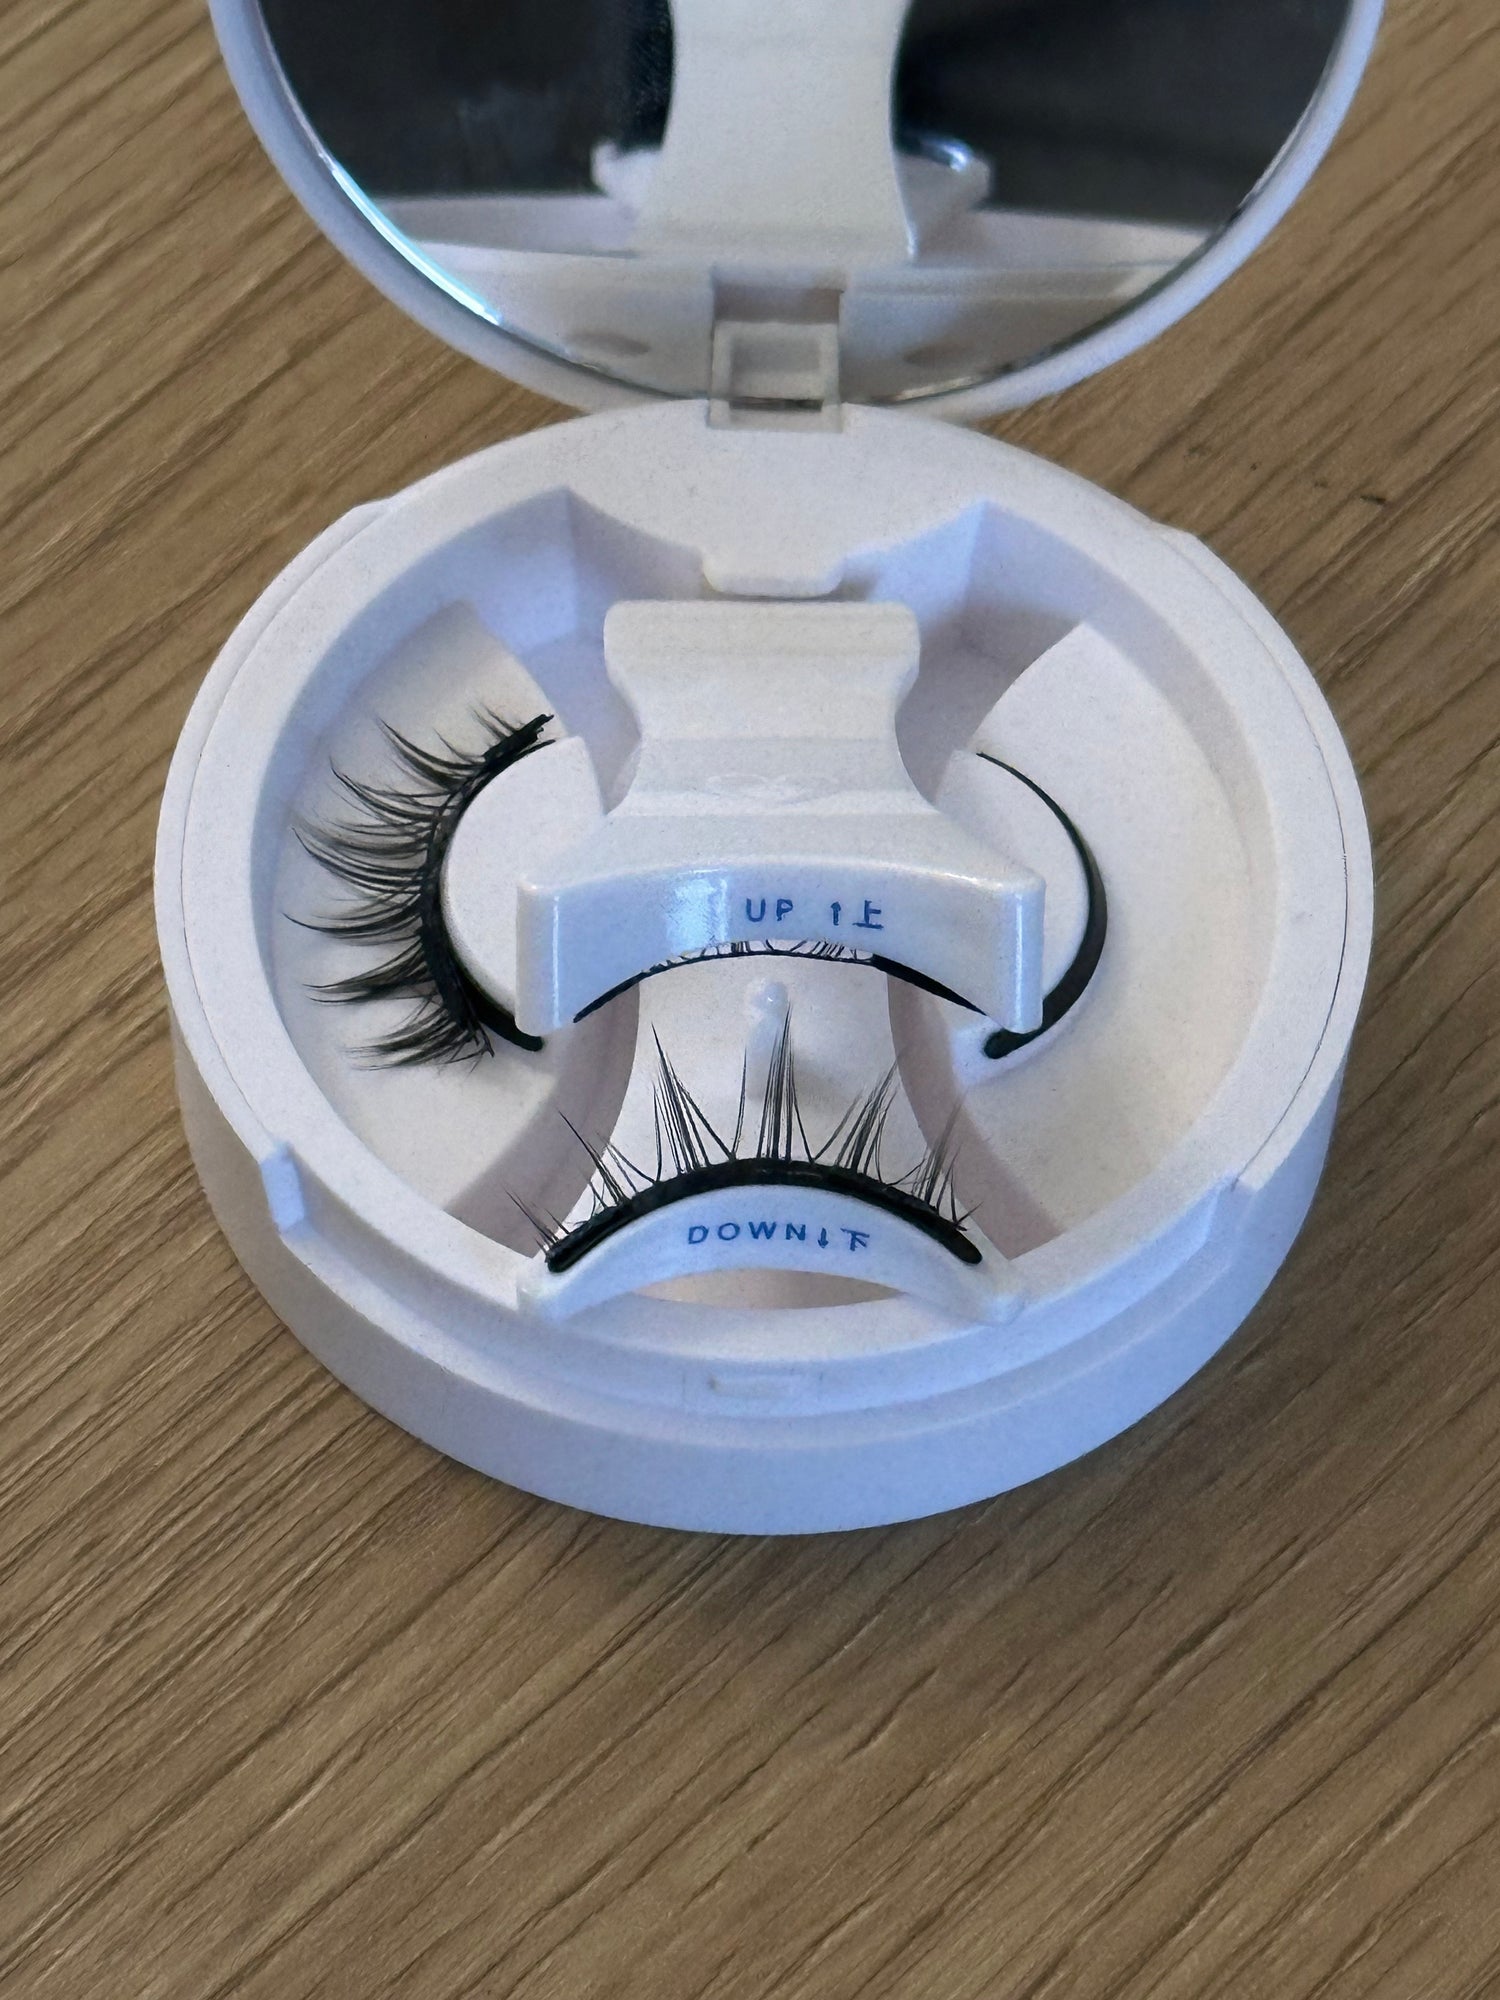
Check the Non-Magnet Edge of the Lash Strips
Once the lash strips are placed in the applicator, make sure the non-magnet edges of the upper and lower strips line up with each other. The non-magnet edge should always be positioned toward the outer corner of your eye (away from the nose), while the magnetic edge goes on the inner corner (closer to the nose).
Verify that the 3 nano-magnets on both the top and bottom strips are visible and properly aligned.
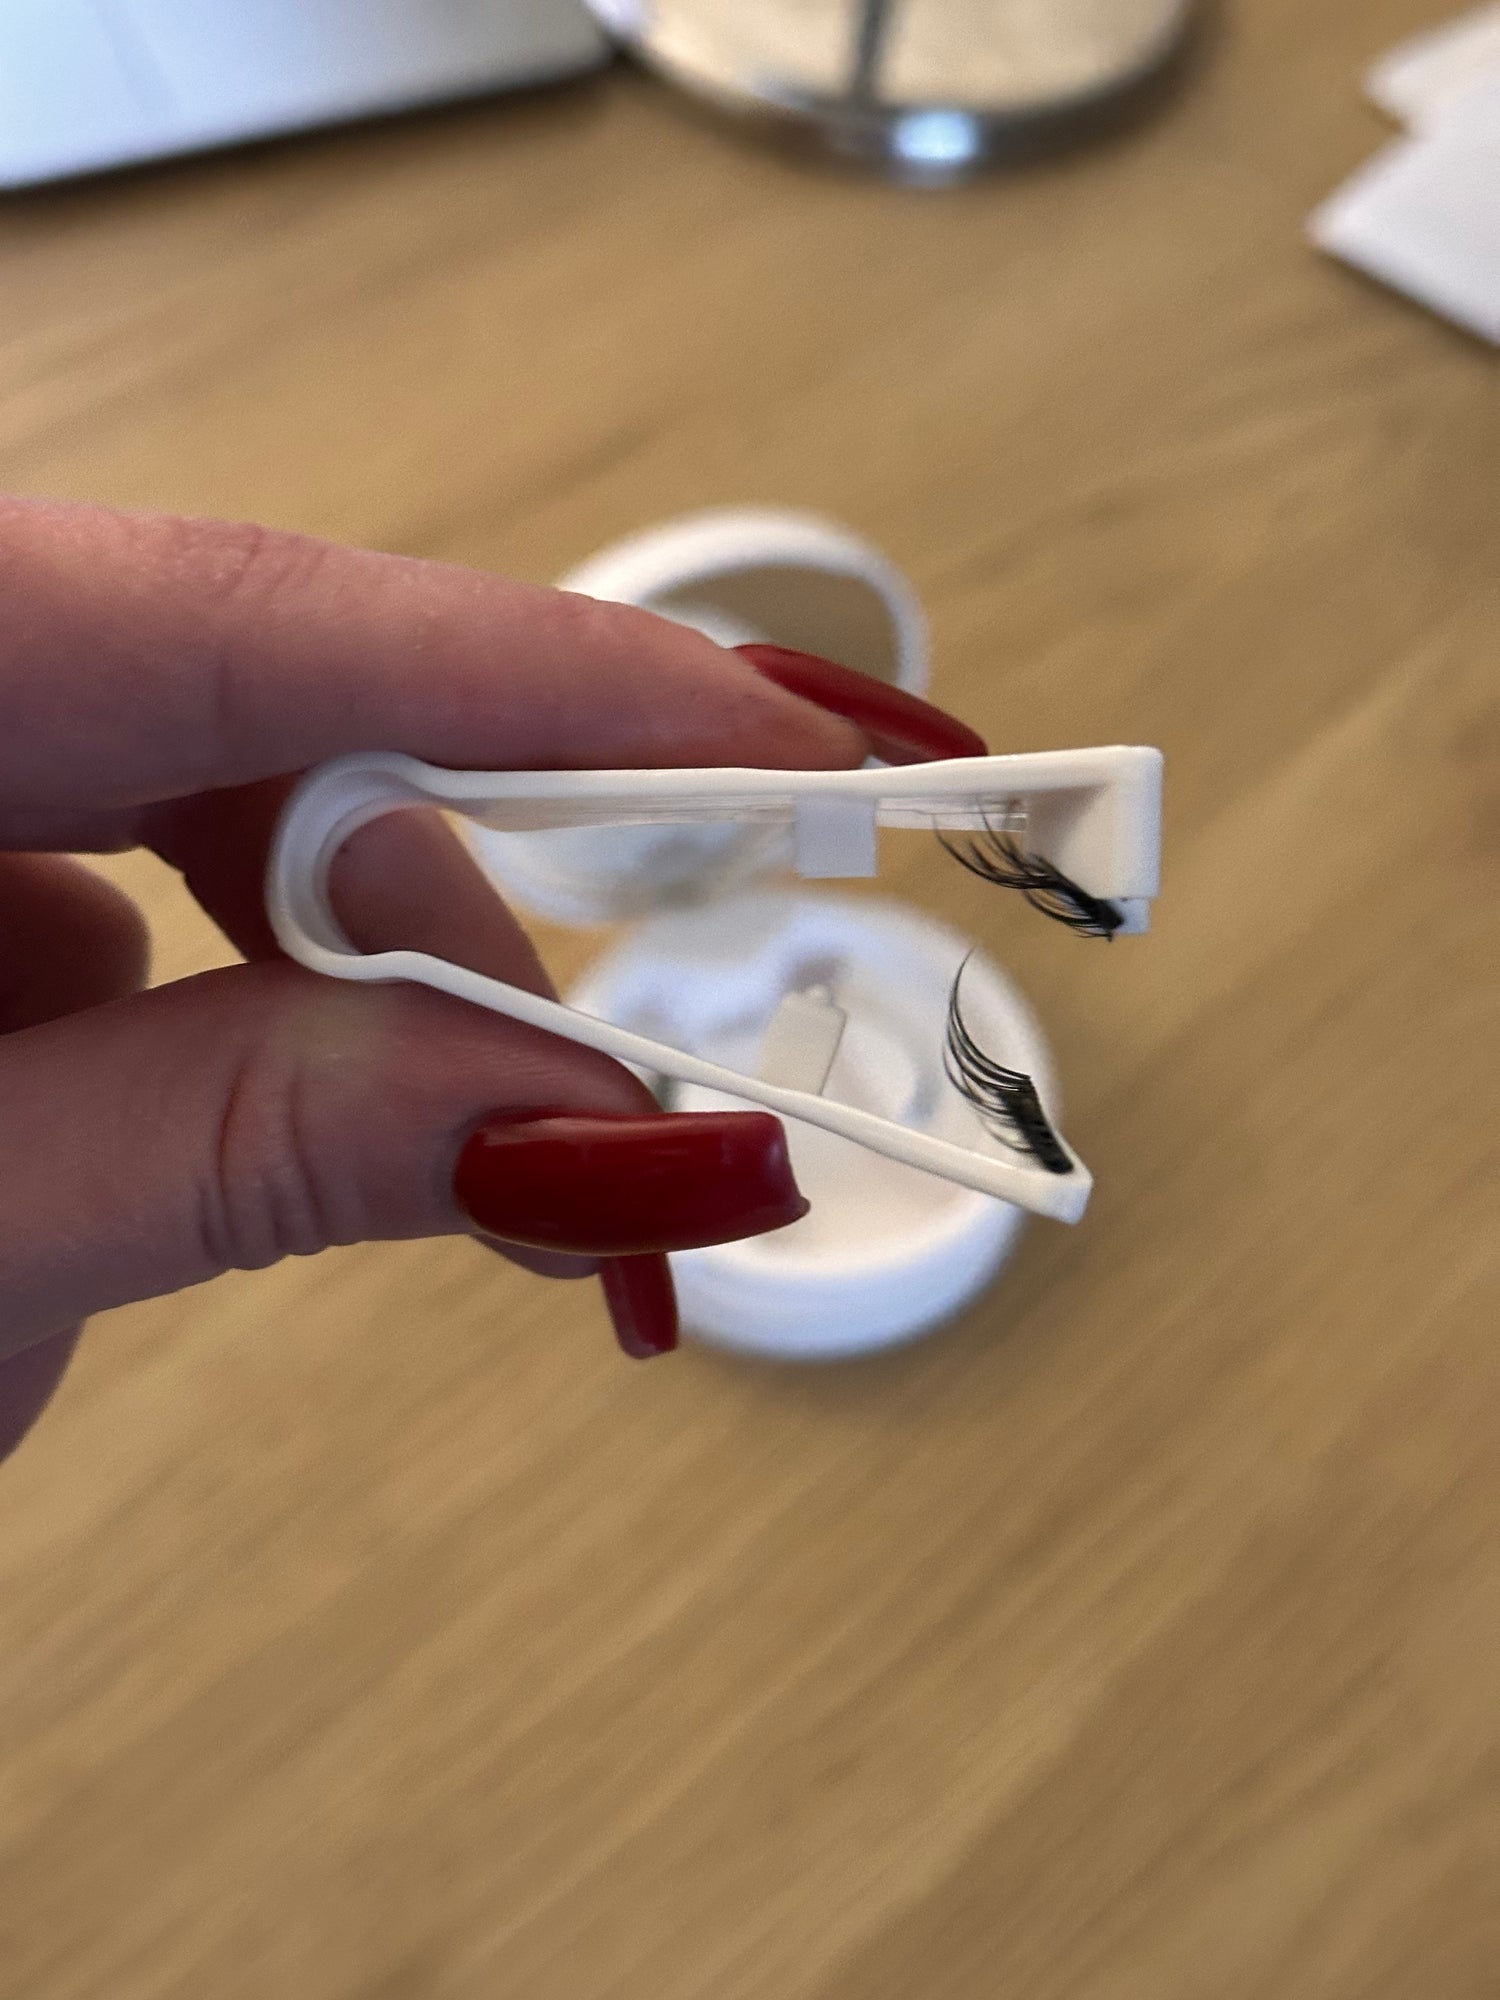
Check the Lash Direction
Before applying the lashes, ensure they are oriented correctly, as shown in the image.
Double-check the following:
- The magnets should be facing inward (towards the center).
- The top and bottom magnets must align properly.
- The non-magnet edges should be on the same side of the applicator.
- Both the upper and lower lash strips should be pointing upwards.
If everything checks out, you're ready to move to the next step. If not, revisit the previous steps to make sure everything is set correctly.
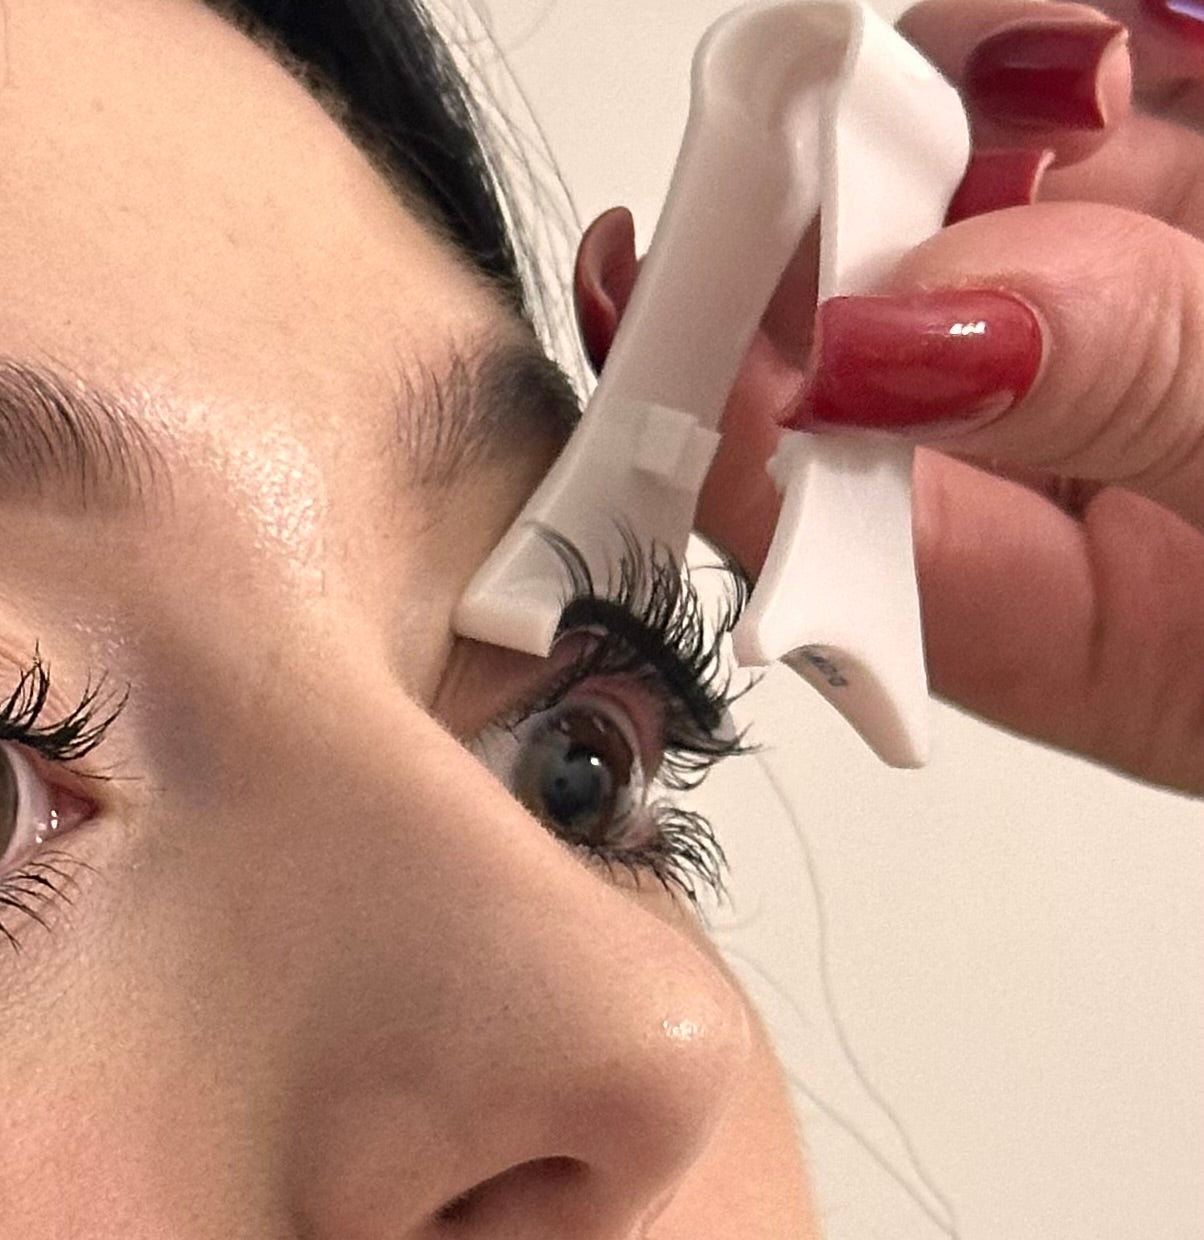
Place the Magnetic Applicator Near Your Eye
For the best application, hold a mirror below your chin at about a 45° angle.
Start by bringing the top of the magnetic applicator close to your upper eyelid. Gently lift your upper eyelid to expose more of your lash line and keep your gaze steady.
Then, carefully bring the lower lash strip up to meet the upper strip, allowing the magnets to snap together. You can move the applicator horizontally to adjust the positioning as needed.
Tip: If it’s your first time using magnetic lashes, don’t worry if it takes a little practice! With a bit of trial and error, you’ll get the hang of it.

How to Remove Magnetic Lashes
To remove your magnetic lashes, start by gently pinching the magnet at the outer corner of your eye with your fingertips and carefully sliding it away. Next, repeat the process for the magnet in the center, followed by the one closest to your eyelid. This method allows the lashes to come off effortlessly.
Important: Avoid pulling the lashes off directly, as this can harm your natural lashes.
